Use Case:
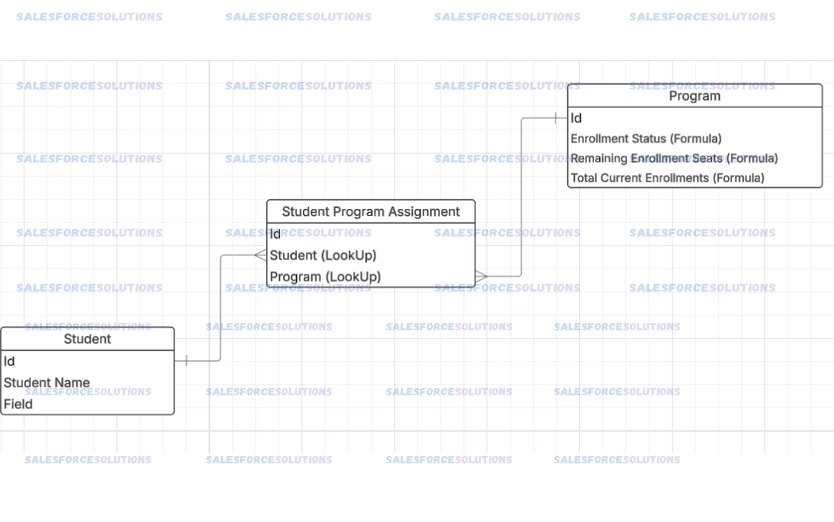
A Educative center wants to track students enrollment on the programs they dictate. They are using Salesforce, and their student-program data model currently looks as it follows:
Context:
For a long time, adding values from a specific field of a child object to track the total amount (or perform calculations) on a parent object was only possible by using the out-of-the-box (OOB) ‘Roll-Up’ fields. Furthermore, these fields were available solely through master-detail related objects, limiting flexibility in data management.
Our Objective:
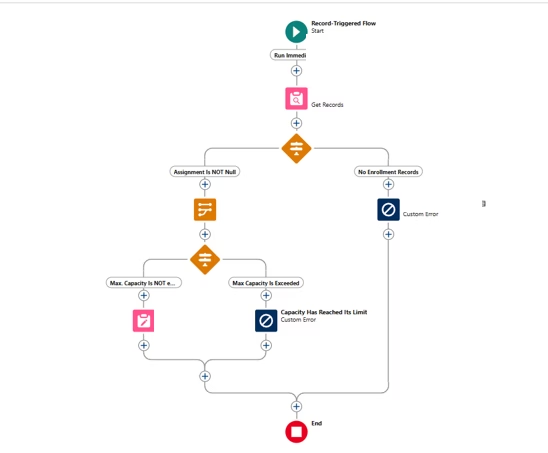
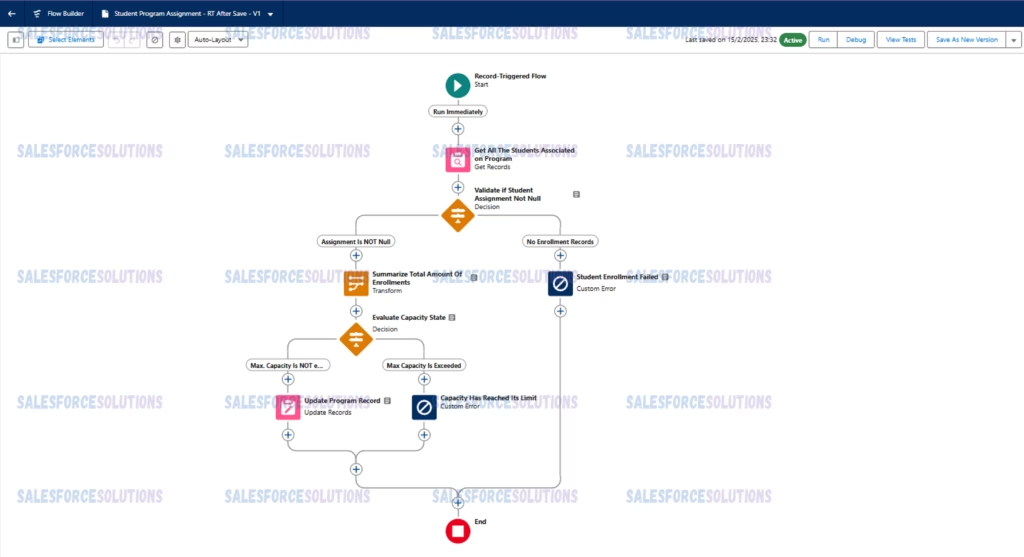
To use a record-triggered flow to calculate total enrollments per program, whenever a student enrollment is added or removed, and then, to update the resulting value on its corresponding program.
The Solution
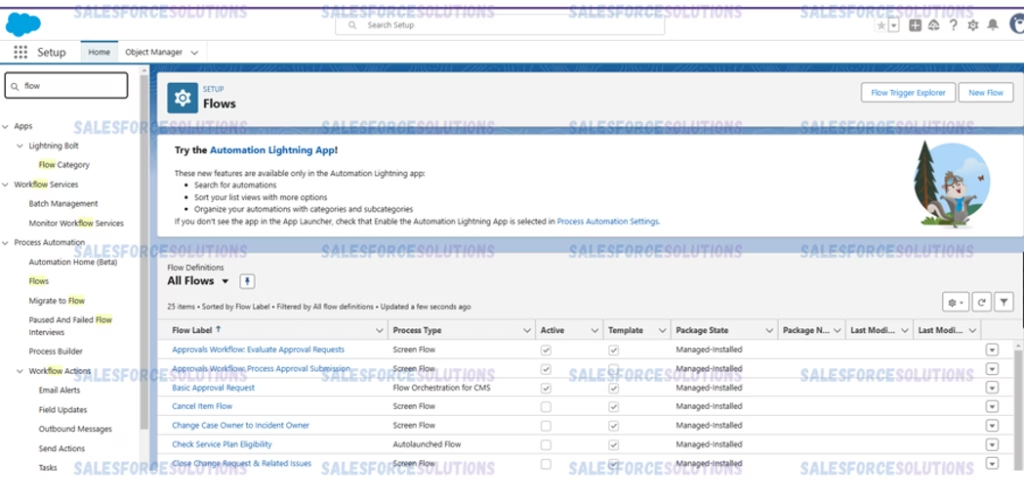
- To begin, type ‘Flow’ in the quick find search box. Then, click on ‘Flows’ under the ‘Process Automation’ section. After that, you will see the following screen. Finally, click on ‘New Flow’ to proceed.
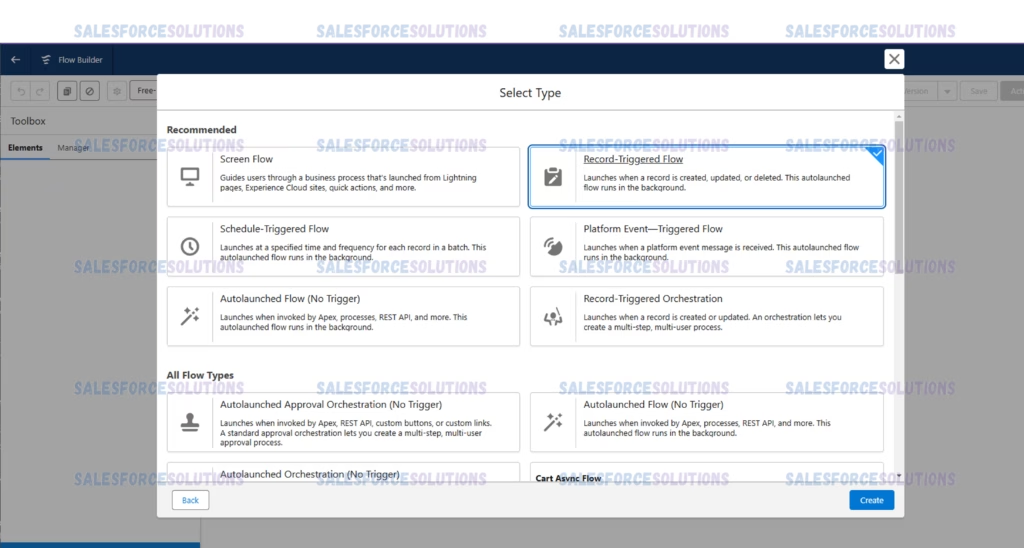
2. On the ‘Select Type’ Modal, click on the ‘Record-Triggered Flow’ and then, hit ‘Create’:
The Flow
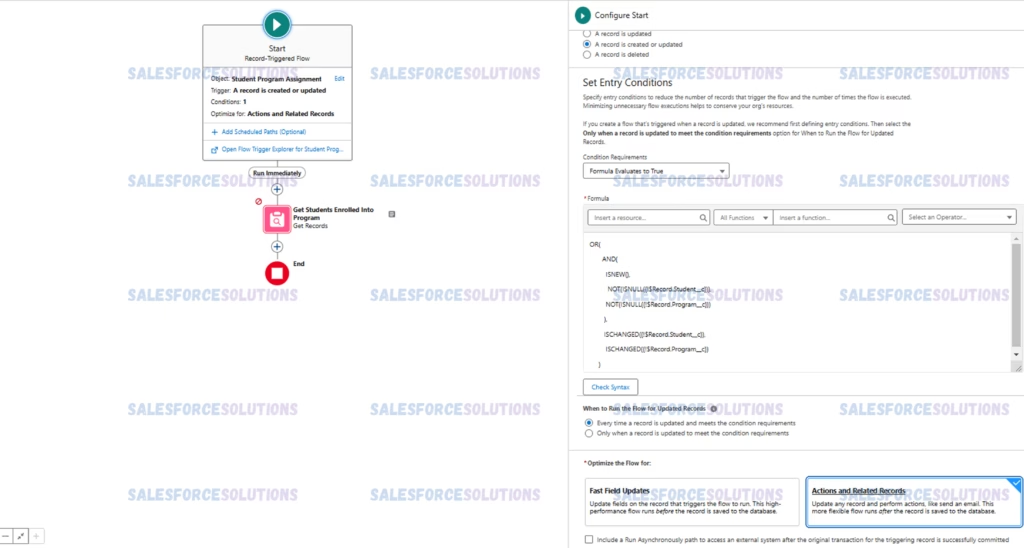
3. While entry conditions aren’t critical to our objective, it is essential to ensure that you set the Flow to be optimized for ‘Actions and Related Records’. Additionally, note that the ‘triggering object’ is the junction object, which connects the actual parent and child objects. In our case, this junction object is the ‘Student Program Assignment.’.
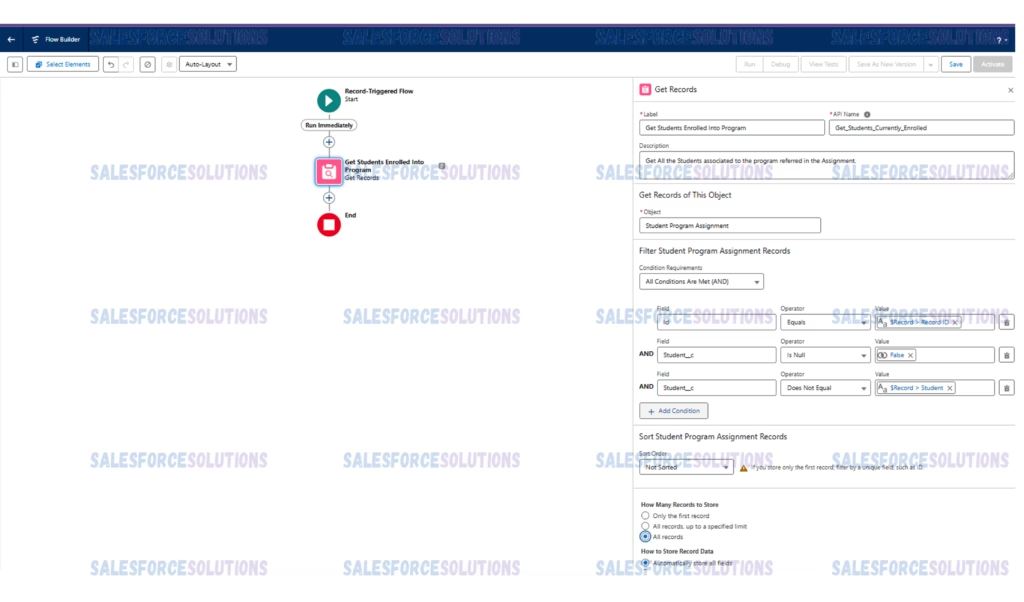
4. To get our first piece of logic in place, we want to use a ‘get Records’ element and make sure to set the filter so we can get all other ‘Student Program Assignment’ records (junction object) where:
A. Parent record Id equals as the records that will be triggering our process.
B. Child record Id does NOT equal the child record Id.
C. Child record Id is also NOT null.
As the following image illustrates:
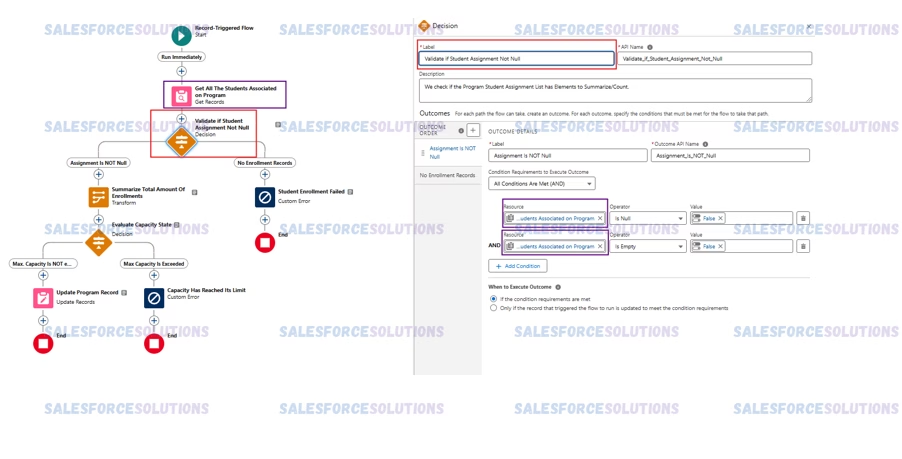
5. With the following element, we’ll ensure that we only run the calculation when there are records available to sum up. This step is crucial for maintaining efficiency, and accuracy in our process:
6. Well now add a ‘Transform‘ Element (this is the piece you were waiting for). With the following screenshot, you’ll see visual reference to reproduce:

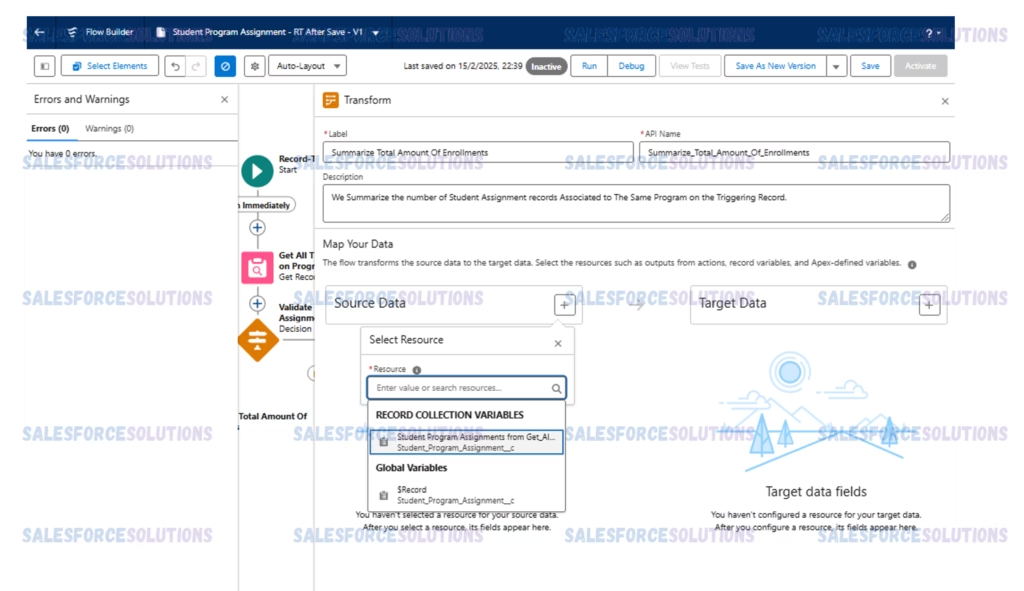
7. Now, you need to double click on the transform element. Data source here, will be the ‘Student Program Assignment’ records (junction object) we have queried above:
8. The following step, is to set the ‘Target Data’, and the first thing is to define its type which for us will be ‘Number’ and then, we’ll set the variable’s name (in our case: ‘Summarize Total Amount of Enrollments’):
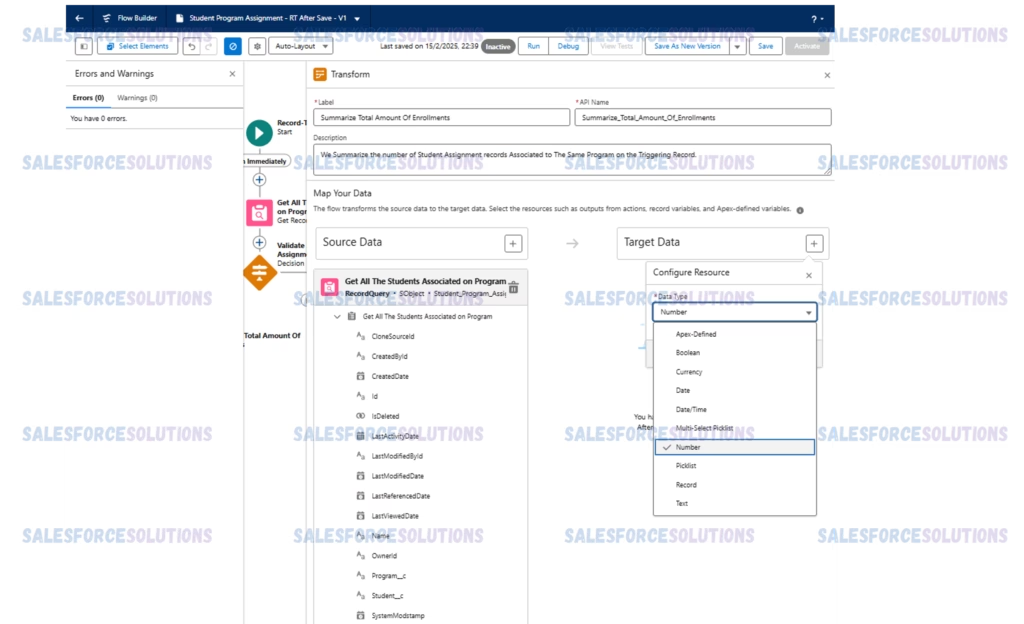
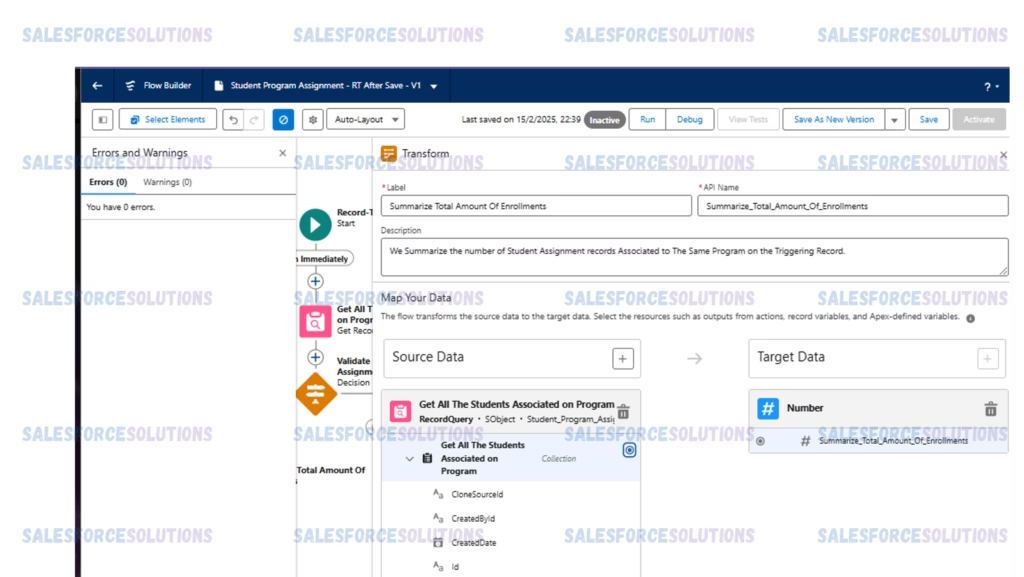
9. Now, do the following:
A. Click on the Source Data’s collection Name radio button.
B. Then, click on the radio-button on the Target data source.
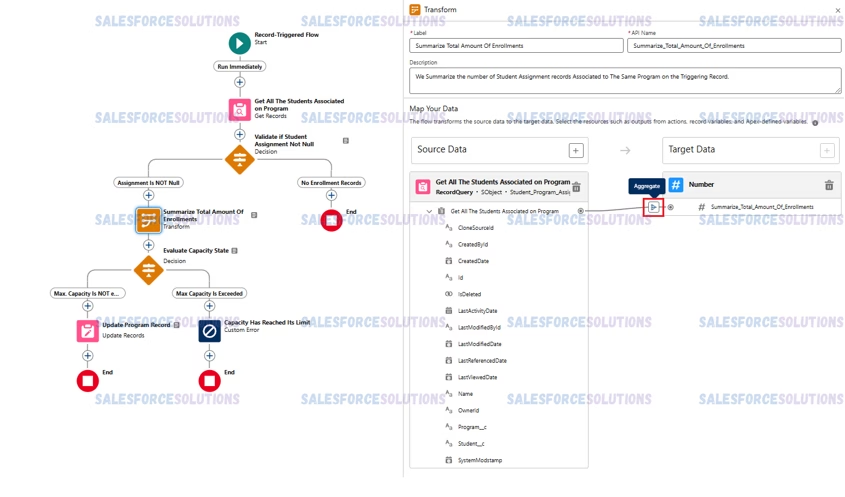
10. Once the the ‘Source Data’ and ‘Target Data’ defined, you’ll se the ‘Aggregate’ function icon appear. Go ahead, and click on it
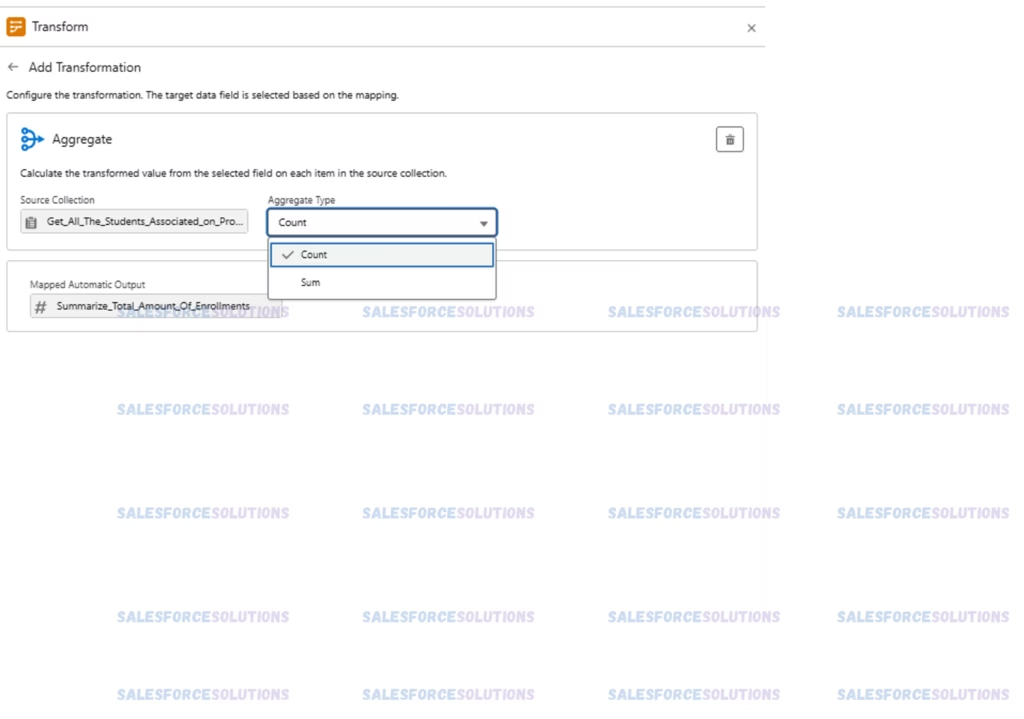
11. Once in the Aggregate section, we have to choose the ‘Aggregate type’, you get to choose from ‘Count’ and ‘Sum’. We Have selected ‘Sum’, don be confused with the following screenshot, as only intends to showcase the available options.
12. Now that we have the total number of enrollments, we have created a new resource that we will use in a decision element to update the available capacity. Specifically, this resource evaluates whether our maximum student capacity for the program exceeds the current enrollments. If it does, the outcome will be true.
Data type of our resource: Boolean
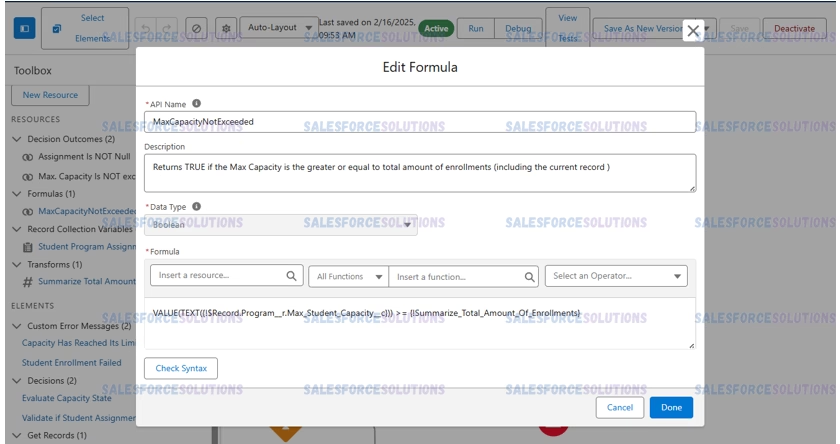
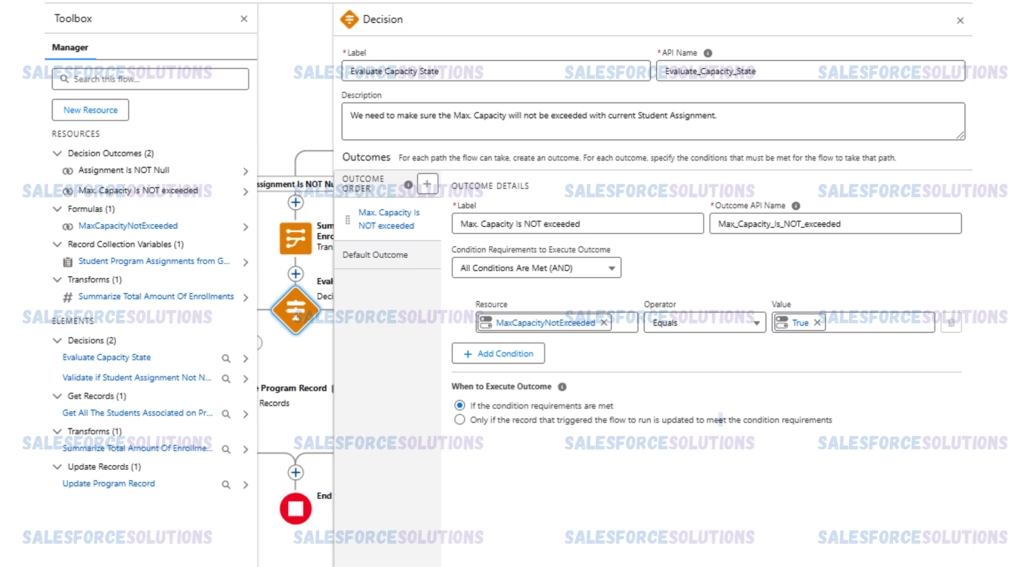
13. At this point, we will add a decision element to evaluate the enrollment state. Please note that we are using the resource we created in the previous step as the comparison variable. Additionally, this approach ensures a more accurate assessment of the enrollment situation:
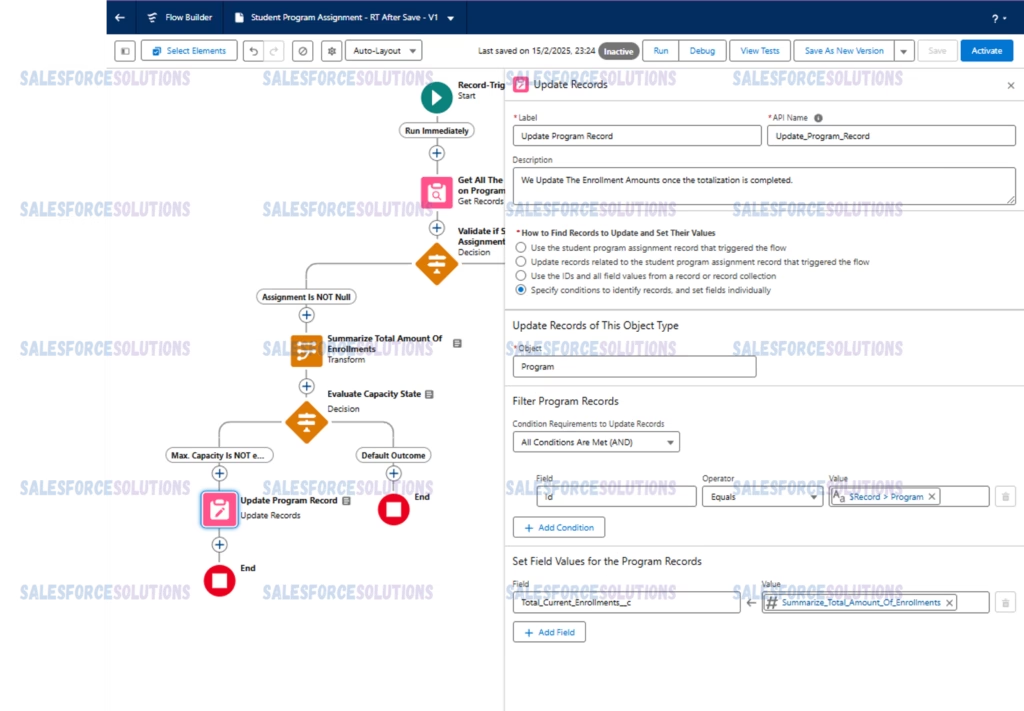
14.In this step, we will add an ‘Update Record’ element to update our Program record with the total current enrollments. Furthermore, this action allows us to ensure that the enrollment data remains accurate and up to date. Below, you will find a screenshot illustrating how it looks:
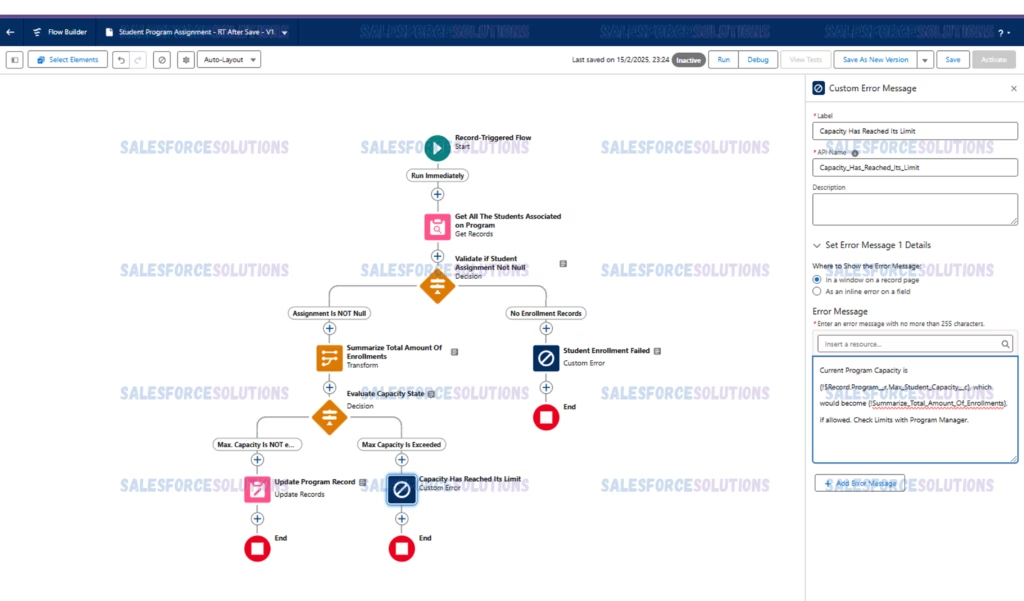
15. Although this step isn’t part of our main goal, we want to demonstrate how to add a ‘Custom Error’. This addition is particularly handy when the program’s maximum capacity has already been exceeded, as it provides useful feedback for users:
Final Details
16. Now that we have rounded our flow, feel free to save and activate. As our flow is complete, we want to provide our users the possibility, the remaining seats on the programs.
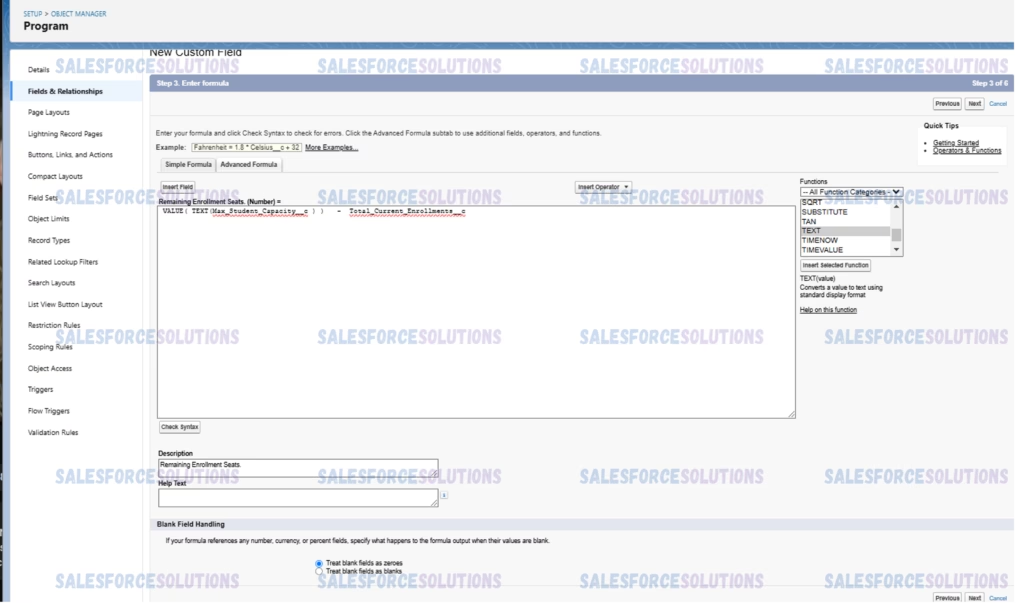
In order to do so, we have created a formula field, in which we are returning/displaying the result of subtracting the total enrolled students to the maximum capacity of the program
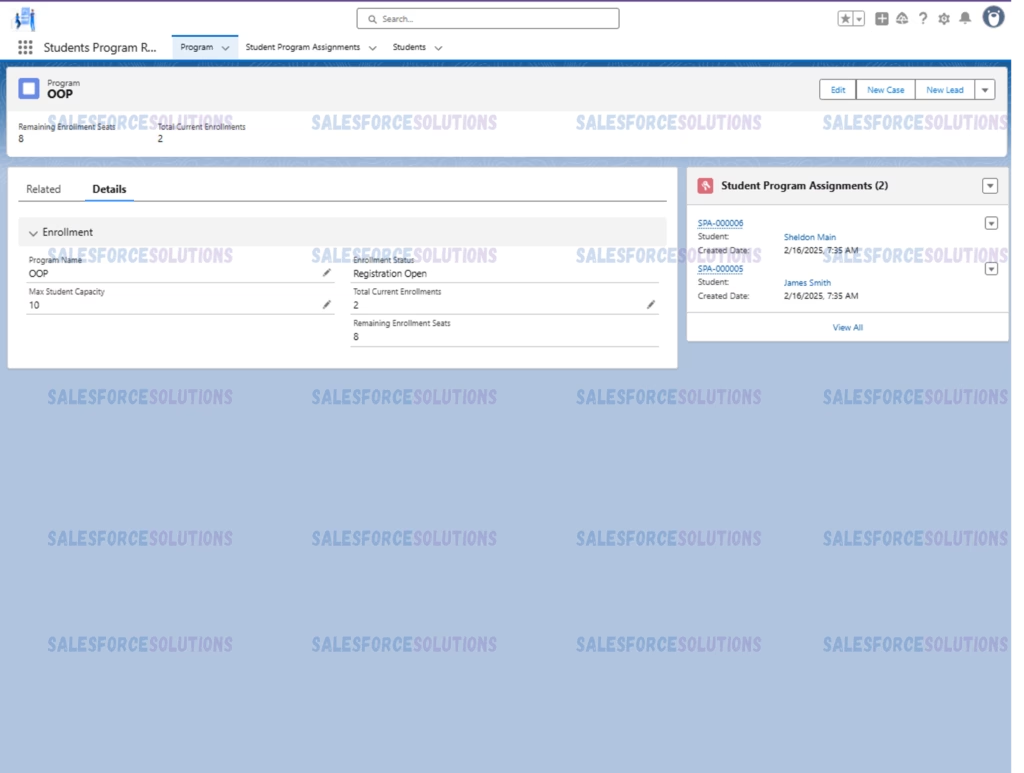
How does the solution look to our final users:
Final Look of our Masterpiece
Final Notes:
Please keep in mind that this is an example of how you build up a roll up functionality, the main idea is for you to use this concepts and adapt them to your specific scenario and empower you to Easily Create Roll-Up for Lookup Relationship Using a Flow.

